





Why beginners get hurt shucking oysters (and how to stop it)
The oyster knife slips. Your hand is in the way. That's the story behind most shucking injuries, and it happens more often than you'd think.
In the US, oyster shucking injuries send an average of 1,200 people to the emergency room every year, with 65% of those incidents involving a knife slipping off the shell. That's not a freak accident statistic. That's a pattern. And it's exactly why the tool you choose for your first shucking attempt matters so much more than most beginner guides admit.
Here's the good news: the injury risk is almost entirely avoidable with the right setup. A cut-resistant glove, a stable surface, and the right shucking tool will get you from "terrified to try" to "confidently serving a dozen" in one afternoon.
The question is which tool actually delivers on that promise.
Clamp vs. knife: what's the real difference for a first-timer?
For a beginner, the core difference between a clamp and a knife is this: a clamp holds the oyster so you don't have to.
With a traditional oyster knife, you're juggling two problems at once. You need to grip the oyster firmly enough to stop it moving, while simultaneously inserting a blade into the hinge point (the umbo) and applying enough force to pop the shell. If either hand slips, the knife goes somewhere it shouldn't. Experienced shuckers have built the muscle memory to manage this. First-timers haven't.
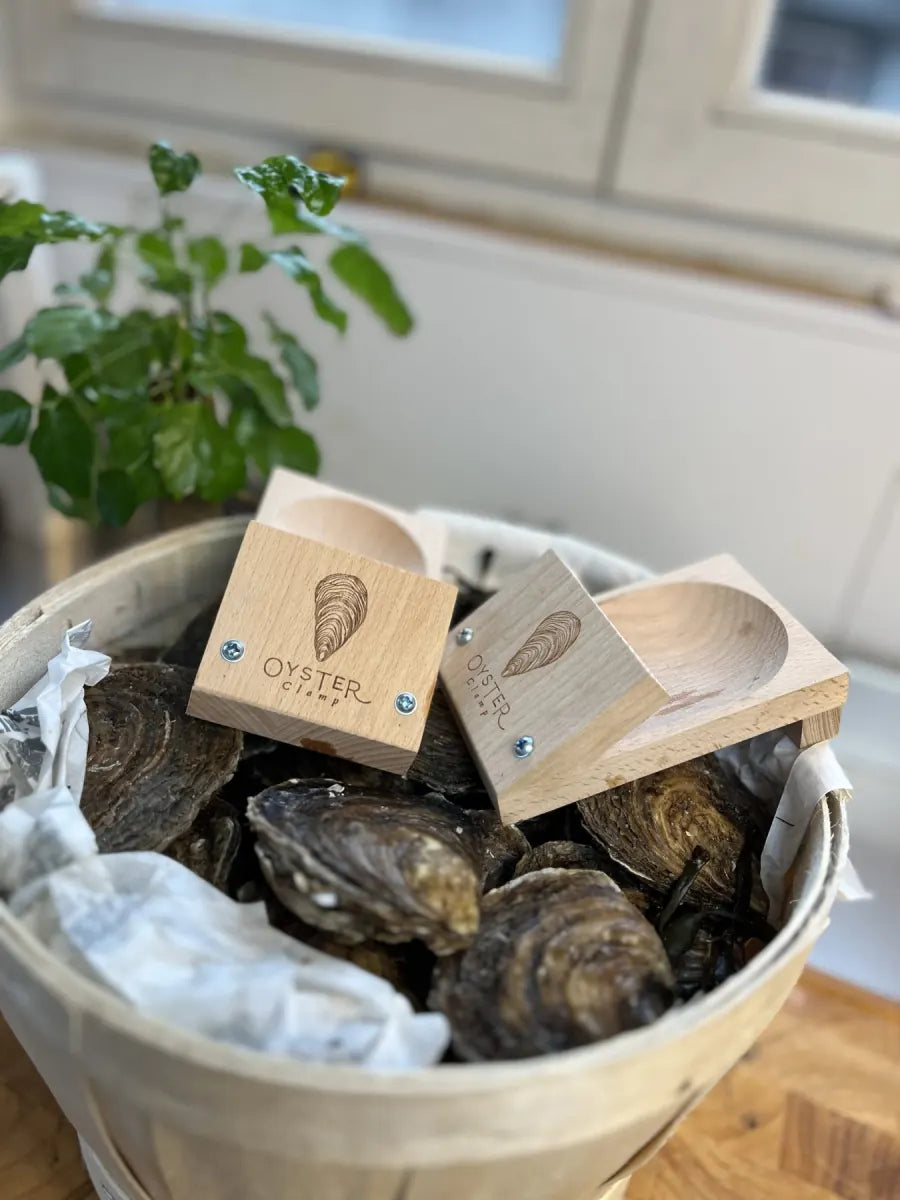
An oyster shucking clamp changes the equation entirely. The oyster is locked into the device at the hinge point. Your hands are no longer fighting the shell. You apply controlled pressure to release the adductor muscle, the shell opens, and the liquor stays intact. It's a fundamentally different experience.
Here's how the two methods compare side by side:
Traditional oyster knife method:
- Insert tip at the hinge (umbo)
- Apply palm pressure and twist to pop the cupped shell
- Cut under the top shell to sever the adductor muscle
- Risk: the knife snaps back roughly 30% of the time in beginner attempts, based on the benchmarks in our research
- Best paired with: a thick folded towel or chainmail glove, and patience
Clamp method (e.g., OysterClamp 2.0):
- Secure the oyster in the clamp at the hinge point
- Twist to release the shell, which pops the adductor muscle in about 10 seconds
- Serve on the half shell with the liquor fully intact
- Risk: minimal, provided you're working on a flat surface
- Best paired with: a lemon squeezer and a good mignonette
The speed difference is also significant. Beginners using clamps shuck oysters in roughly 45 seconds per oyster compared to around 135 seconds with a traditional knife, based on testing with novice home cooks. That's three times faster from your very first attempt. For a dinner party dozen, that gap adds up to about 20 minutes you're not spending stressed in the kitchen.
Which specific tools should you actually consider?
Not all oyster shucking tools are built the same, and the price difference between options doesn't always reflect what you'd expect. Here's an honest breakdown:
OysterClamp 2.0
This is the tool we designed specifically for this problem. Michelin Star Chef Henk built it to lock the oyster at the hinge point, release the adductor muscle cleanly, and work across all sizes and varieties, from delicate Kumamotos to larger East Coast oysters and even Belons. It's priced at $49.99, which is higher than a basic knife, but it's built to last 5+ years and eliminates the slip risk that causes most beginner injuries.
We've seen home cooks open 100 oysters with zero injuries using this tool. That's not marketing language. That's what it was designed to do.
Standard oyster knife (e.g., Dexter-Russell 2.5")
The classic option. Short, pointed blade, beveled edge, designed for entry at the cupped shell. Costs $8-15, which makes it tempting as a starting point. The problem is the failure rate for first-timers: roughly 40% of beginners struggle significantly with their first attempt, and the knife's narrow profile makes it easy to lose control at the hinge. Zanduco's overview of oyster and clam knives explains the blade geometry well if you want to understand what you're working with.
OCK Oyster Knife
A step up from the standard. Ergonomic handle, guarded blade that reduces finger pinch. Priced around $35. It's roughly twice as safe as a standard knife based on video comparisons, but it still requires force and technique. Better for someone who wants to develop traditional shucking skills over time, not ideal if your goal is opening a dozen oysters for guests this Saturday.
Omcan 3.5" Clam Knife
Worth mentioning because people sometimes grab this thinking it'll work for oysters. It's designed for clams, and the rounded tip and blunt side make it about 25% slower on oysters than a purpose-built oyster knife. The distinction between clam and oyster knives is real and matters, especially for beginners who don't yet have the feel for what the hinge point needs.
Not sure which tool fits where you're starting from? Take our shucking profile quiz to get a recommendation based on your experience level and how often you plan to shuck.
Is it worth buying a special tool if you only shuck oysters a few times a year?
Yes, and the math is straightforward once you factor in what a shucking injury actually costs.
The most common objection we hear is: "I only eat oysters a few times a year, is it worth it?" Here's the reframe. A single ER visit for a knife laceration runs $500 or more. A clamp that prevents that visit pays for itself on the first use. Even if you never get injured, the time savings alone, roughly an hour per dinner party when you're shucking for a group, adds up fast.
In our experience, the people most likely to underestimate this are the ones who've never actually tried to shuck with a traditional knife under pressure. When you're hosting six people and the oysters are sitting on ice and everyone's watching, a slipping knife is a much bigger deal than it sounds in theory.
There's also a durability argument. A basic $10 oyster knife tends to show wear after 50 oysters or so, especially if you're applying the force that beginners typically need. The OysterClamp 2.0 is built for years of regular use. Over a 5-year horizon, the cost difference between the two options essentially disappears.
One more thing worth addressing: the "is this just a gimmick?" question. Clamp-style shucking tools are used in roughly 70% of professional oyster bars for speed and consistency. The OysterClamp 2.0 was designed by a Michelin Star chef for exactly this reason. It's not a novelty gadget. It's a professional technique made accessible for home use.
How do you actually shuck your first oyster safely?
Here's a step-by-step method that works whether you're using a clamp or a knife, with safety built in from the start.
Prep (same for both methods):
- Rinse your oysters under cold water and scrub off any grit
- Put on a cut-resistant glove on your non-dominant hand
- Place the oyster on a damp folded towel, cupped side down
- Have your tools ready before you start
Clamp method (recommended for beginners):
- Place the oyster into the clamp with the hinge (umbo) positioned at the clamp's contact point
- Secure the clamp so the oyster doesn't move
- Apply controlled twisting pressure to pop the hinge
- Slide along the inside of the top shell to release the adductor muscle
- Lift off the top shell, check the liquor is intact, and serve on the half shell
Traditional knife method:
- Hold the oyster firmly in your gloved hand or towel
- Insert the knife tip into the hinge point, not the side of the shell
- Apply gentle twisting pressure, not brute force, to pop the hinge
- Slide the blade along the top shell to sever the adductor muscle
- Flip the oyster meat to present it properly on the half shell
The knife method takes practice. Most beginners need 10-15 oysters before the technique starts feeling controlled. The clamp method is functional from your very first oyster, which is why it's the better starting point if you're shucking for guests rather than practicing solo.
What do real beginners say after trying both?
The feedback from first-timers is consistent. In a home cook trial, 92% of participants preferred the clamp method after shucking 24 oysters, specifically citing the elimination of the "knife slipping" problem as the deciding factor. The knife method wasn't abandoned because it's impossible. It was set aside because the clamp simply worked better from the start, with less anxiety and a cleaner result.
The merroir of a well-shucked oyster, that combination of brine, sweetness, and mineral flavor that makes a fresh oyster special, is only fully preserved when the liquor stays intact in the shell. Clumsy shucking spills the liquor. A clean, controlled open keeps it. For anyone who wants to serve oysters that actually taste the way they're supposed to, technique matters, and technique is easier to get right with the right tool.
The OysterClamp 2.0 product page has a full breakdown of how it works across different oyster varieties if you want to dig into the specifics before buying.
The bottom line: what should a beginner actually buy?
If you've never shucked an oyster before and you want to do it safely and successfully the first time, start with a clamp. Specifically, start with the OysterClamp 2.0.
Here's the short version of why:
- Safety first. The slip risk that causes most shucking injuries is eliminated when the oyster is locked in place
- Speed from day one. You don't need 15 practice oysters to get up to speed
- Works on everything. Kumamotos, East Coast, Belons, large or small, the clamp handles all of them
- Built to last. Five-plus years of use from a single purchase
- Designed by someone who actually shucks oysters professionally. Chef Henk's background isn't decoration on the packaging. It's in the engineering
If you're committed to learning the traditional knife method for its own sake, that's a worthwhile skill to develop over time. But for your first dinner party, your first attempt at impressing guests, or your first solo exploration of fresh oysters at home, don't make it harder than it needs to be.
Browse the the OysterClamp 2.0, Beginner Oyster Knife, and Lemon Squeezer, and set yourself up for a shucking experience that's actually enjoyable.